


Change the resolution of a widget
Choose how long one period of a widget is - a day, a week, a month, a year, a salary period, or a length of your own that you can save as a preset.
Before you start
You need:
- Access to the Dashboard (Dashboard in the side menu)
- A widget on your Dashboard
New to the app? Start with Sign in to the web app.
When to use it
When a widget should show its data per week instead of per month, or in periods of your own length.
Step by step
-
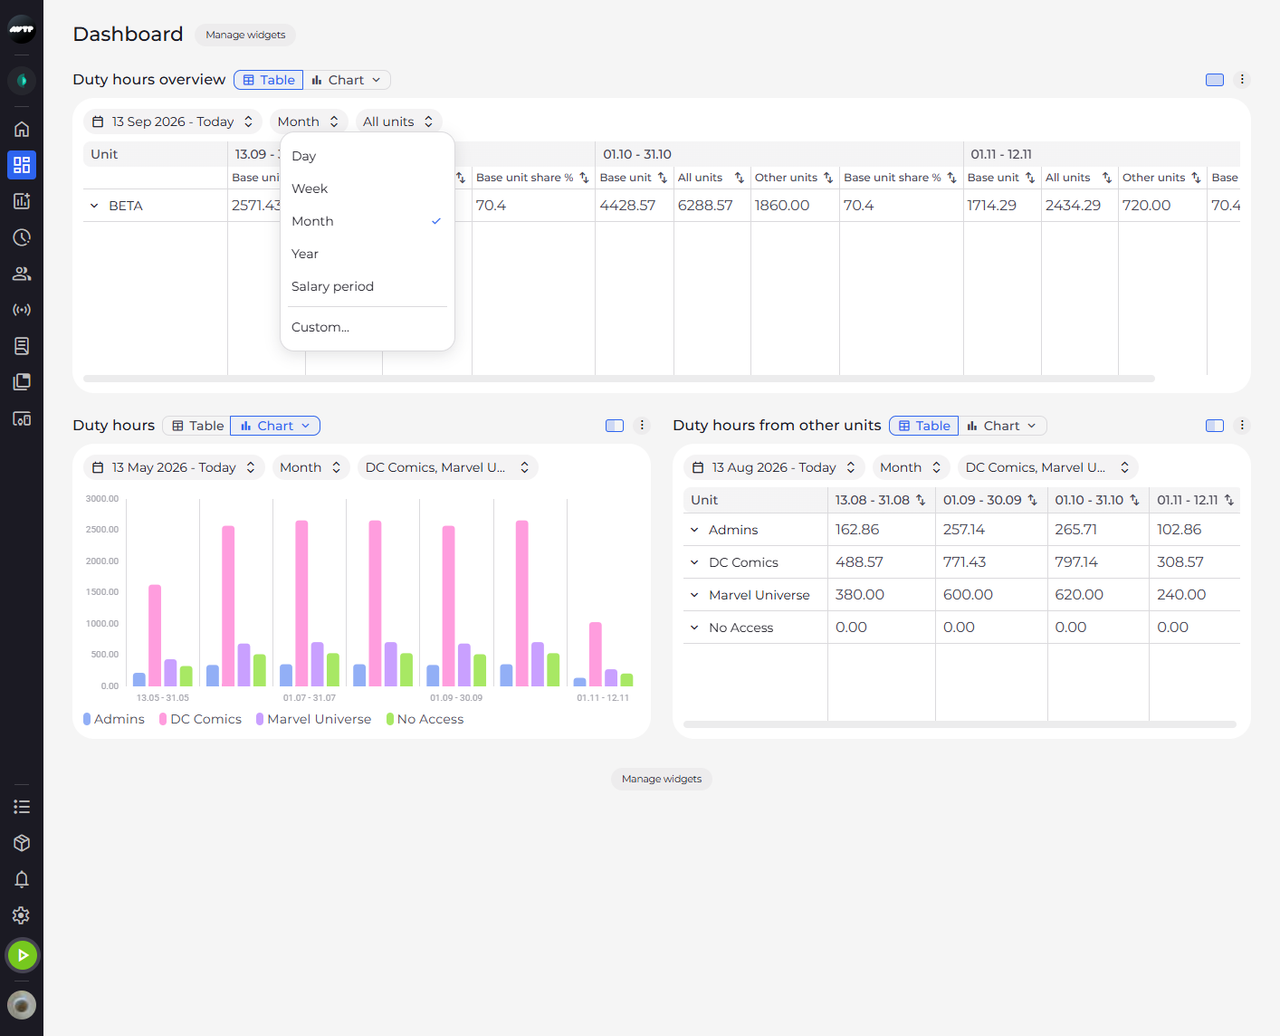
Step 1: Click the resolution chip to choose how long one period is
Click the resolution chip of the widget - the second chip, which names the current resolution. A menu lists Day, Week, Month, Year and Salary period, with a tick next to the current one, and Custom... at the bottom. Click one to apply it: the chip shows its name and the columns of the widget change to match.
Tip: With Salary period, point at the resolution chip to see whose salary periods the widget uses - the tooltip says "Salary periods of" and the name of the unit.
-
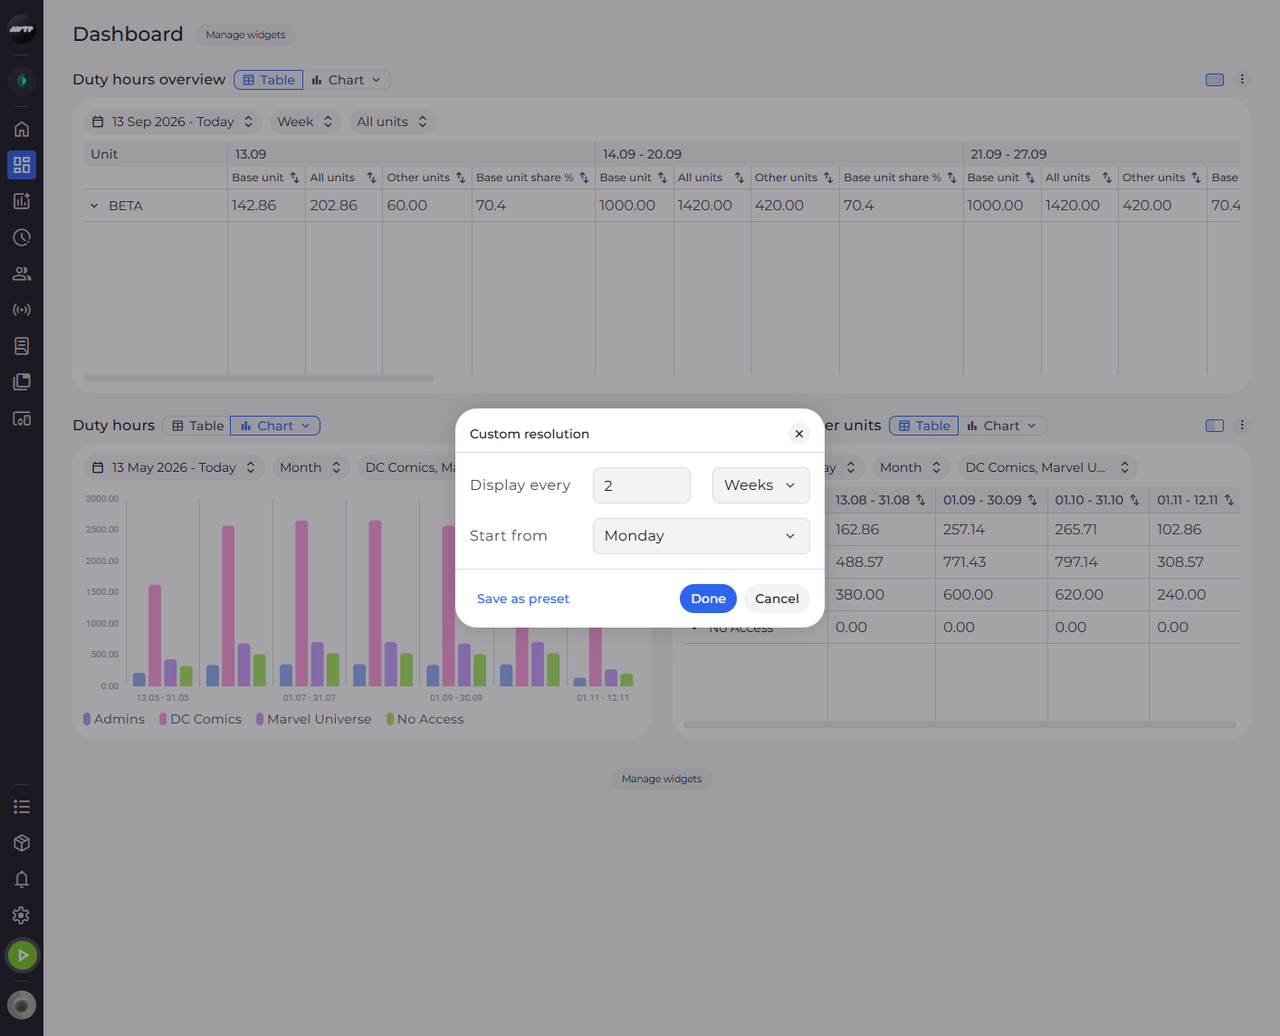
Step 2: Custom... sets your own period - here every 2 weeks, starting on Mondays
Click the chip again and choose Custom.... In the Custom resolution dialog, type a number next to Display every, choose its unit next to it and, next to Start from, when the periods begin. Click Done to apply it, or Save as preset to apply it and keep it for later.
Tip: Start from depends on the unit - a time of day for Hours, a weekday for Weeks and a date in the calendar for Days. Leave the date empty and day periods start with the date range.
Tip: Done and Save as preset stay unavailable until Display every is a whole number of 1 or more ("Enter a whole number of 1 or more."). With Hours you also need a start time ("Enter a start time.").
Tip: Save as preset adds the resolution to the resolution menu of every widget. If you may edit Dashboard lists in Settings, you choose For me only or For everyone; otherwise the preset is saved for you only.
-
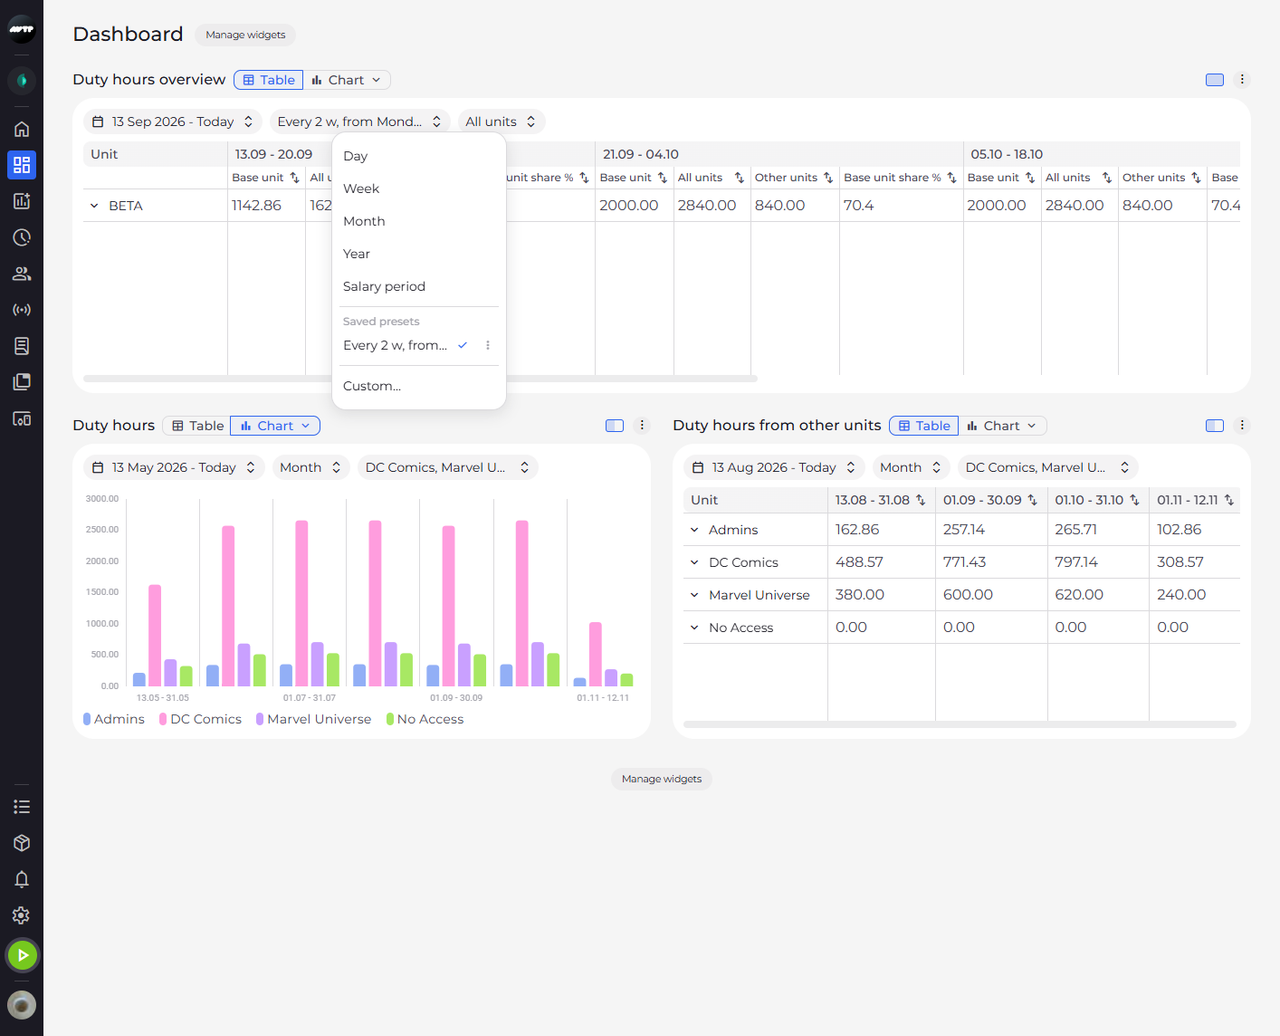
Step 3: A saved preset is one click away in every widget's resolution menu
The dialog closes and the chip shows your resolution in short. Click the chip again: your preset is listed under Saved presets, ticked because the widget uses it. Click a preset to apply it.
Tip: To delete a preset, click the three dots next to it and choose Delete preset. Widgets that use the preset keep their resolution.
What happens next
The widget shows its data in periods of the length you chose, and your preset is ready in the resolution menu. The resolution is saved with the widget, so it stays the next time you open the Dashboard.
Questions
Why are there no three dots next to a preset?
You can delete the presets you saved for yourself. A preset saved for everyone can be deleted only by someone who may edit Dashboard lists in Settings.